Add Natural Decor with DIY Pressed Leaf Art
If you’re a plant lover, you no doubt have plants in your home as elements of living decor for your space. But if we know your style (and we think we do), you probably decorate with botanical prints on your walls, throw pillows, and accessories too. Looking at you, Etsy search history for “Monstera leaf earrings.”
This DIY tutorial will walk you through the process of making pressed leaf art to frame and hang on your walls to preserve the beauty of your plants in every room.
Why press leaves?
Pressing your plant’s leaves or blooms maintains their beauty long-term. If you’re pruning a leggy vine, trimming off a dying stem, or have a blooming plant going dormant, you can easily keep a piece of the plant and use it as artwork.
How to press leaves
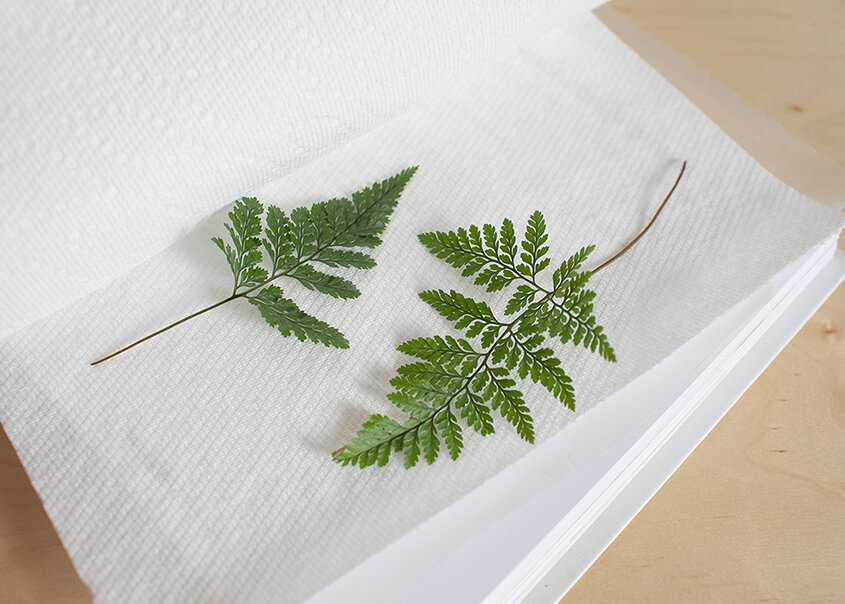
The easiest way to press a leaf or flower is to use wax paper, paper towels and a few heavy books.

Open the book and place a sheet of wax paper inside, long enough to cover both of the pages showing.
Place a layer of 1-2 paper towels on the right side of the wax paper. This will help absorb any moisture from the leaves.
Place your leaves and flowers on the paper towel as flat as possible.
Place a layer of 1-2 paper towels over the placed leaves.
Fold the left side of the wax paper over the leaves.
Close the book over the leaves enclosed within the wax paper and paper towels.
Place another book or two on top of the book to help press them flat.
Check the leaves once a week until they are completely dry. If the paper towels are wet, replace them with new paper towels.

Tip: You can preserve bright colors of the leaves by ironing them first. Leaves will dull as they dry out, so to help keep them bright follow these steps!
Place the leaf between two sheets of wax paper.
Cover with a towel.
Press with a hot iron (do not steam) for 2-5 minutes until the leaf feels dry.
Flip it all over and repeat with the towel on the underside of the leaf.
Peel the wax paper away from the leaf, which should leave a layer of wax on the leaf to help preserve color.
Thinner leaves will dry much faster than thicker leaves. Good candidates for leaf pressing are Arrowhead Vine, Dieffenbachia, Ferns, Fittonia, Ivy, Philodendron, Pothos, and Zebrina. You could also make beautiful pressed leaves from some of our Signature Collection plants, including Alocasia, Calathea, Fiddle Leaf Fig, and ZZ Plant.
Sansevieria and Peperomia leaves may be pressed but since they’re thicker and retain more water, they may take longer to dry out completely. And of course you can try your hand at preserving flowers too.
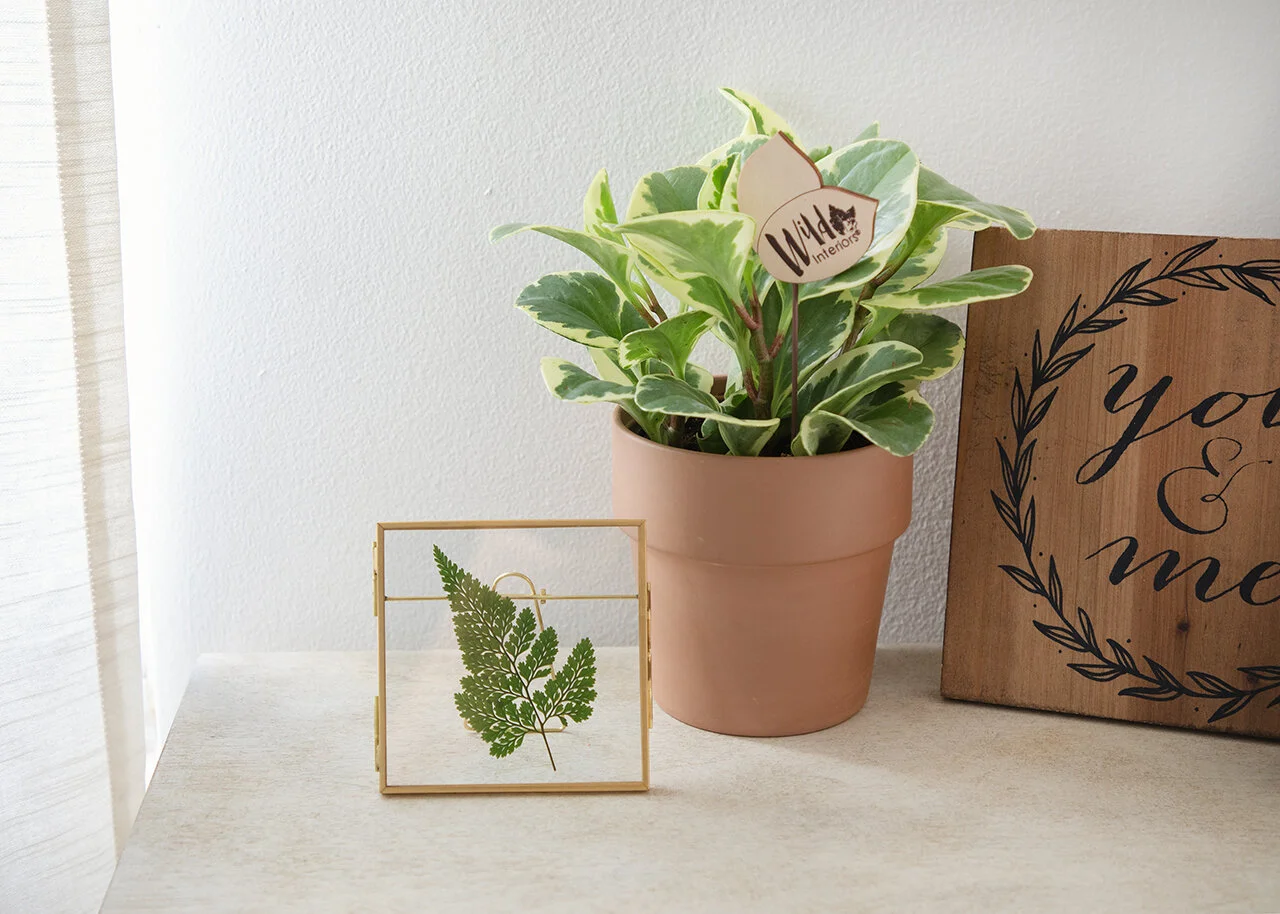
How to frame pressed leaves


You can use any frame you like with a matting board behind the leaves, but a floating frame will make them stand out beautifully in your decor! A floating frame is clear all the way through, giving whatever is inside the illusion of floating in mid-air.
Arrange your leaves in whatever configuration you like, mixing and matching shapes, colors, and textures for your ideal display. Then hang on the wall in a bedroom, bathroom, office, or anywhere else you want to add a little piece of your plants!
Show us your artwork
We cannot wait to see what you do with this tutorial, so tag us @wild_interiors on Instagram when you show off your new art skills.